Spring is just around the corner and the flowers will bloom with rain filling the air. Well, lets get the flowers blooming early by making Cupcake Liner Flowers! It is a beautiful looking craft and a great decoration to keep in your house.
Materials
Cupcake Liners
Washi Tape (printed masking tape)
Pipe Cleaners
Light-Gauged Wire
Glue
Scissors
Buttons
First, fold the cupcake liners in half. Next, wrap the cupcake liner loosely around a pipe cleaner. With the washi tape, tape around the bottom of the flower and keeping wrapping until the whole pipe cleaner is covered. For the leaves, sandwich a 5 inch piece of light-gauged wire between two cupcake liners that are flattened. In addition, glue it on but leave 2 inches of wire left.
More importantly, take the wire that was left and wrap it around the pipe cleaner and tape it if you like. Next, glue a button in the middle of the flower. Now, take 5-10 cupcake liners and wrap all around a stem. When you are done, it should look a flower with many petals! Have fun and decorate!
Today we are going to learn how to draw a beautiful and colorful peacock. It is easy to draw and all you need is a paper, pencil, and an eraser.
First, draw two big semi-circles under each other. Next, draw a small circle in the middle for the head and then a line going down for the neck. Third, draw a body shape from the neck and two lines for the legs. Also, make two lines coming out from the bottom of the body.
In addition, draw oval like shapes for the tail feathers and a fluffy cloud like shape in the middle of the body.
You are half way done! Now, add larger feathers to the feathers you already have, an eye and a beak. After, add three curls on top of the head.
Furthermore, add another set of feathers that are larger than the others. Then, add another cloud like shape under the other.
More crucially, draw the "eye" feathers on the peacocks' feathers. To do that you have to draw straight lines from behind the peacock and a tear drop shape. Inside, draw the eye.
Finally, erase all the unneeded lines and color! Have fun coloring!
Hey guys! I'm back! Today we are going to learn how to make Pom Pom Flower Balls! This is a fun and exciting craft to make and great to hang in your bedroom! Let's get started!
Materials
Five pieces of tissue paper (same or different colors)
Scissors
Curling ribbon
First of all, line up all the tissue paper so it is in a pile. Next, fold all the tissue papers in half. In addition, cut on the crease so you will have ten pieces of tissue paper. Once again, lay the ten pieces of tissue paper so they are aligned. Furthermore, fold the tissue paper all the way so it is like an accordion. Basically, you fold the top an inch down and then turn it over. Next, you do the same thing to this side and you keep doing it until you have to more tissue paper left to fold. After you have done that, trim the ends so it is in a shape of a triangle. Now, fold it in half so you can find the middle point.
More importantly, cut a small piece of curling ribbon and tie it in the middle point really tight so it wont come off. In addition, fan the two sides out and then take each tissue paper and fluff it out by pulling each piece up or down. In the end, you will have a Pom Pom Flower Ball!
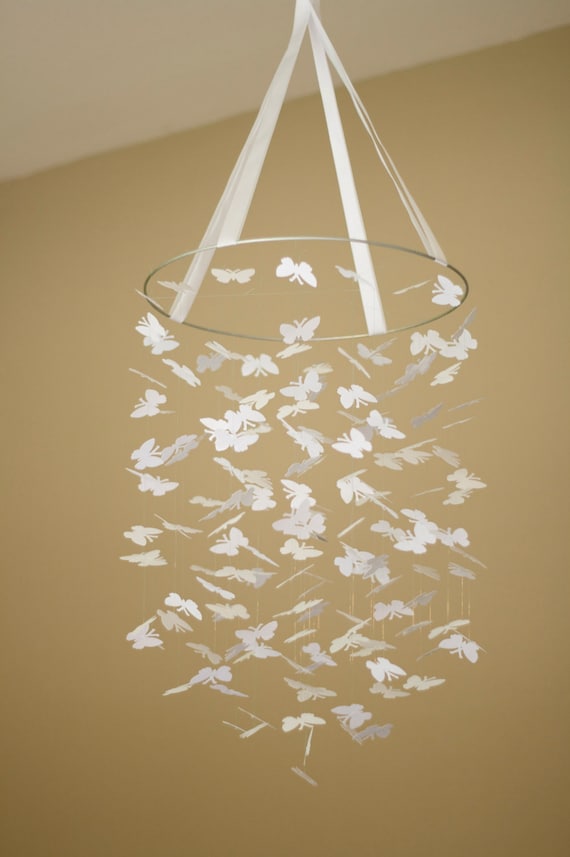
Hey guys! Valentines day is around the corner so we are going to make a Heart Mobile! This is great to hang down from your ceiling and is a great February craft! Although you can make this with any shape, I am going to teach you with hearts!
Materials
Large hoop
String
Red or pink construction paper
Ribbon
Scissor
Glue gun
Now we are ready to start! First, cut out four pieces of ribbon. Each should be about a foot long. Next, find the middle of one string and place the middle on the hoop so it wraps around. Do this with each ribbon and tie all of them together on the top just like the picture. In addition, take the construction paper and cut about 100 small hearts. After, cut out different sizes of string and make them long enough so you can hang them up on the mobile. Cut about 50 strings Furthermore, take the glue gun and glue the small hearts to different parts of the string. Hang them up and down so it is filled with hearts!
More importanly, let it dry and then glue the top of each string to the hoop with the hot glue gun. Let it dry again. This project takes about three hours. The longest step is when you need to cut out about 100 hearts. The part where you cut the string is long as well. GOOD LUCK AND HAVE FUN! :o)
Today we are going to learn how to draw a cartoon dolphin in only seven steps. It is a quick and easy drawing to do and very cute as well. It's a great thing to draw with only a few materials.
Materials
Paper
Pencil
Eraser
First, draw the body of the dolphin. It looks almost like a rain drop but it is slanted. Draw it large because how big you draw it depends on how big you want your dolphin to be.
Next, draw the dolphins head, nose, and beak. From the round side of the "rain drop," draw a line curving out which connects to the dolphins beak.
In addition, draw an eye on the round part of the "rain drop." Also, draw a small smile by the beak.
Furthermore, draw two fins from the middle of the "rain drop." One fin should be from your angle and the other should be at the angle from the other side.
More importanly, draw the dorsal fin on top which is almost like a curved triangle.
Now, you can draw the fin which is like two curved triangles facing down and touching each other.
In summation, erase all the unneeded lines like the lines in step one. When it is finished, it should look like the picture below.
Do you remember when you were small and you asked your parents for those little scratch pads where you draw on it by scratching it? Well, there is no point of buying it at the store anymore because you can make it with only a few materials that are easily found around the house!
Materials
SCRATCH KNIFE
Paper
Oil Pastels
Pencil
Black Acrylic Paint
Paint Brush
Scratch Knife
Ruler
First, take a pencil and draw lines going straight anywhere on the paper. They have to go across the whole paper. You can draw the lines diagonal, up and down, or side to side. You can make it look like a checker board too! Next, you need to color with the oil pastels. Color each place with a different color so none of the same colors are touching. You can also use a pattern to color like green, blue, green, blue, e.t.c. When you color, you should have no white spaces at all because when you scratch it off, it will look white instead of the colors you chose. Color the whole paper.
Now comes the really exciting part! You need to take the black paint and paint it on top of the paper. The whole paper should be filled with black paint so it is all black and no colored spaces. Furthermore, let it dry completely. When it is completely dry, you can take the scratch knife and scratch off any design you like. While you are scratching, you should notice that the colors you chose under the black paint is the colors that appear when you scratch.
I'm back! This blog post is very special because its my first blog post of 2013 and I find this project really cool! It a marvelous gift too! This would be a great gift for your teachers too! All you need is a few materials:
A white candle (any size)
Tissue paper
A stamp (its length should be about the same as the candle)
Ink
Decorations (Ribbons, scrapbook paper, e.t.c.)
Heat Gun or a Hair Dryer
Scissors
First, take the tissue paper and cut it about the size of the width of the candle. Next, take your stamp and put it on the ink so you can stamp it. Rub it on the ink smoothly so the stamp comes out fully colored and moist. Stamp it on to the tissue paper a few times so the whole tissue paper is stamped. Don't worry if it overlaps. In addition, take the candle and lay it down in the middle of the tissue paper and wrap the tissue paper around the candle. More importantly, take the heat gun or your hair dryer and turn it on. (if you have a blow dryer, then turn it on HIGH) Blow it on to the tissue paper so the design would melt onto the candle. You will be able to see the wax melting a little but let it melt. Keep doing this until the tissue sticks to the candle.
Furthermore, you can add decorations to it. This is just an idea. You can cut scrapbook paper to fit around the candle and tape it or glue it on top of the tissue paper. You can also tie a ribbon on top of the scrapbook paper so it looks more fancy! Just use your imagination for how to design it.